
Looking for the best espresso machines under $100? I tested three affordable options to see which ones are actually worth your money. The De’Longhi Stilosa is my top pick for most beginners, while the Flair Neo Flex and Leverpresso V4 are better choices if you prefer manual espresso or need something portable.
If you are trying to make good espresso at home without spending $300 or $500, you have to accept a few compromises. Machines in this price range are usually simpler, and some require more hands-on work.
That does not mean you have to settle for poor coffee.
I have spent time using the three espresso makers below, and each one has a different strength. The Stilosa is the easiest choice for everyday home use, the Flair Neo Flex is excellent for manual brewing, and the Leverpresso V4 is the one I would take when portability matters most.
Here are my three picks for the best espresso machines under $100.
1. De’Longhi Stilosa Best Overall Espresso Machine Under $100
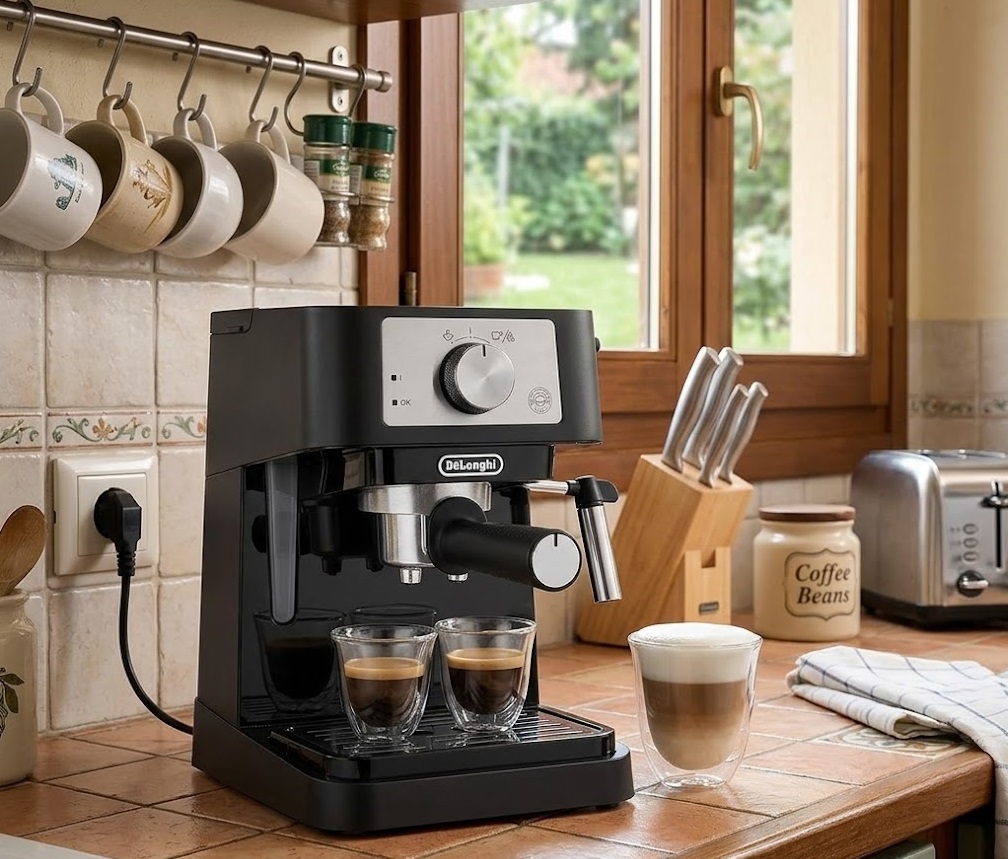
The De’Longhi Stilosa is the machine I would recommend first to most beginners. I have used it myself, and for the price, I was pleasantly surprised by what it can do.
Before buying it, I spent a lot of time reading reviews from people who had owned the machine for years. Many owners were still happy with it after long-term use. After spending time with it myself, I can see why it has remained such a popular budget espresso maker.
The Stilosa has a simple design, but that is actually one of its advantages. There are no complicated menus or unnecessary controls. It is compact enough for a small kitchen, and it does not take up much counter space.
For someone searching for the best espresso machine under $100, this is where I would start.
How to use De’Longhi Stilosa
Key Specifications
- Pump: 15-bar pressure pump
- Boiler: Stainless steel
- Operation: Manual
- Steam Wand: Manual
- Design: Compact
- Best For: Beginners and everyday home espresso
My Experience With the De’Longhi Stilosa
One thing I like about the Stilosa is that it lets you learn the basics of espresso.
You control the shot instead of simply pressing a button and walking away. You need to decide how much coffee to use, how fine to grind it, how firmly to tamp it, and when to stop the shot.
When I first started using it, I did not get perfect espresso every time. Some shots were too fast, while others took too long. After some experimenting with the grind and dose, I became much more consistent.
For me, that is part of the appeal.
If you are completely new to espresso, the learning process can seem frustrating at first. But after you understand what the machine is doing, making a shot becomes much easier.
Espresso Quality
For a machine at this price, the espresso can be surprisingly good.
Of course, the machine is only part of the equation. Your coffee beans, grinder, dose, and technique all matter.
I noticed a clear difference when I switched from older coffee to fresh beans and paid more attention to the grind. The espresso became richer and more balanced.
One thing buyers in the US and Canada should know is that the basket setup can vary depending on the market and version of the machine. Some versions use pressurized baskets, while other regional versions may come with non-pressurized baskets.
If your Stilosa comes with a pressurized setup, you can still make good espresso. You can also upgrade the basket or portafilter later if you want more control.
How Good Is the Steam Wand?
The steam wand is useful, but I would not buy the Stilosa specifically for advanced milk steaming.
It works well enough for cappuccinos and lattes. With some practice, you can produce decent milk foam.
However, getting the fine micro foam needed for detailed latte art can take more effort than it would with a better espresso machine.
For a beginner making an occasional latte at home, I think it is perfectly acceptable.
Things I Learned While Using It
There are a few things I recommend keeping in mind.
Give the machine time after brewing. The Stilosa can retain pressure after the shot. I found it better to wait a little before removing the portafilter rather than rushing straight into cleanup.
Consider replacing the included tamper. The plastic tamper is basic. A better-fitting metal tamper can make puck preparation easier.
Use fresh coffee. This made a bigger difference to my results than I initially expected. Freshly roasted beans and a suitable grind can make budget espresso taste much better.
Clean the machine regularly. Wipe the steam wand after every use and keep up with cleaning and descaling. This helps maintain performance and prevents buildup.
Final Verdict
After using the De’Longhi Stilosa, I think it offers one of the best combinations of price, simplicity, and espresso quality in this category.
It is not a fully automatic machine, and there is a small learning curve. But that is exactly why I think it is a good choice for beginners who want to understand espresso rather than simply press a button.
If you want an electric machine for your kitchen and your budget is around $100, the De’Longhi Stilosa is my top pick.
Pros and Cons
Pros
- Affordable for beginners
- Compact design
- Makes good espresso with the right coffee and technique
- Manual controls give you more control over your shots
- Steam wand works for basic lattes and cappuccinos
- Good machine for learning espresso
Cons
- Requires some practice
- Included plastic tamper is basic
- Steam wand is not ideal for advanced latte art
- Can retain pressure after brewing
- Basket setup varies by market
Frequently Asked Questions About the De’Longhi Stilosa
Is the De’Longhi Stilosa worth it?
Yes. If you want an affordable electric espresso machine for home, I think the Stilosa is one of the better options under $100. It is simple, compact, and capable of producing good espresso once you learn the basics.
Can the De’Longhi Stilosa make real espresso?
Yes. The machine uses an espresso brewing system and can produce good shots. Your results will depend heavily on your coffee beans, grind size, dose, and technique.
Is the De’Longhi Stilosa good for beginners?
Yes. It does have a learning curve, but the controls are simple enough for a beginner to understand. I also like that it gives you room to improve your technique.
2. Flair Neo Flex Best Manual Espresso Maker Under $100
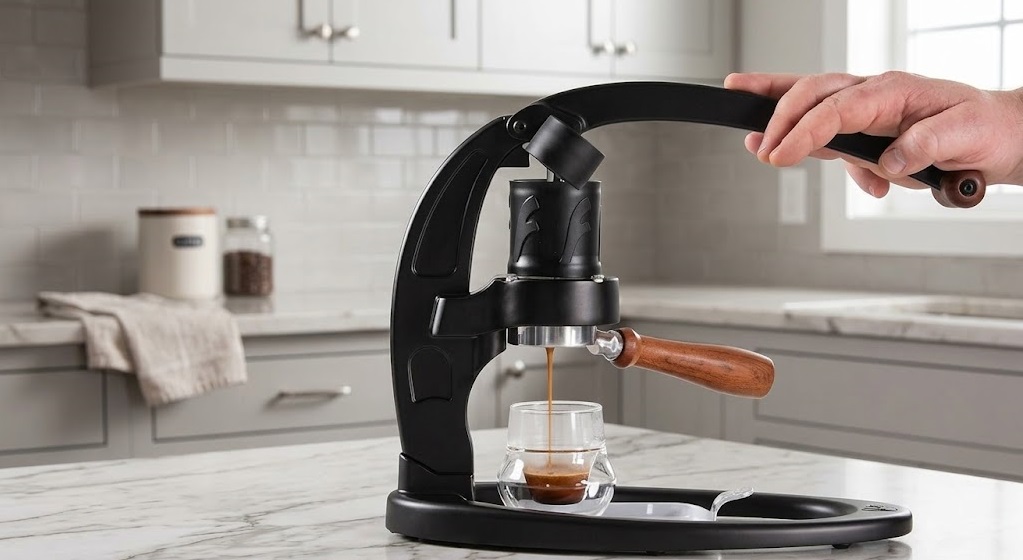
If you do not need an electric machine, the Flair Neo Flex is a completely different type of espresso maker.
I have been using the Neo Flex for almost a year, and what I enjoy most is how hands-on the process feels. There is no electric pump doing the work for you. You prepare the coffee, add hot water, and pull the shot using the manual lever.
That makes it slower than the Stilosa, but it also gives you a lot more control.
For someone looking for an espresso maker under 100 who enjoys the process of making coffee, the Neo Flex is a very interesting option.
How to use Flair Neo Flex
Quick Specifications
- Type: Manual lever espresso maker
- Power: No electricity
- Pressure: Manually generated
- Portability: Excellent
- Best For: Manual espresso and travel
- Operation: Hands-on
Why I Like the Flair Neo Flex
The biggest reason I like the Neo Flex is the control.
Once I understood the workflow, I started getting much better results from it. The shots can have good body, crema, and strong flavor when everything is prepared correctly.
The Neo Flex is also a good machine to grow with. Beginners can start with a more forgiving setup and then experiment with a more traditional espresso workflow as their skills improve.
That is useful because you do not have to learn everything at once.
The Learning Curve
There is definitely more work involved than with the Stilosa.
You need to heat the water separately and preheat the brewing chamber before making your espresso. Then you need to grind the coffee, tamp it, add the water, and pull the lever.
My first few shots were not great. I had some sour and watery cups while I was learning how grind size and preparation affected the extraction.
After some practice, it became much easier.
I actually enjoy this part when I have enough time. But if you want coffee quickly on a busy morning, an electric machine is much more convenient.
Excellent for Travel
This is where the Neo Flex really shines.
It is lightweight and easy to pack, so it makes a lot of sense for travel, camping, or visiting friends.
You do not need an electrical outlet. As long as you have hot water and ground coffee, you can make espresso.
That makes the Neo Flex one of the better choices if you want a best coffee machine under $100 that can go beyond your kitchen counter.
Do You Need an Expensive Grinder?
A good grinder can definitely help.
Manual espresso makers are sensitive to grind size and consistency. If the grind is too coarse or inconsistent, it becomes harder to get the extraction you want.
The good news is that beginners do not have to start with the most expensive grinder available. The more important thing is understanding how your grind affects the shot and making small adjustments as you learn.
Final Verdict
The Flair Neo Flex is not the right choice for everyone.
If you want fast and easy espresso, I would choose the Stilosa. But if you enjoy the ritual of making coffee and want a lightweight machine that gives you plenty of control, the Neo Flex is hard to ignore.
After using it myself, I think it is one of the most appealing options in the best espresso machines under $100 category for manual espresso lovers.
Pros and Cons
Pros
- Can produce excellent espresso
- Completely manual
- Does not need electricity
- Lightweight and portable
- Good option for travel and camping
- Lets you learn more about espresso extraction
- Can grow with your skills
Cons
- Requires preheating
- More preparation than an electric machine
- Learning curve can be frustrating
- Not ideal for making several drinks quickly
Frequently Asked Questions About the Flair Neo Flex
Is the Flair Neo Flex good?
Yes. I think it is an excellent choice if you enjoy manual espresso. Once you understand the workflow and get your grind right, it can produce very satisfying shots.
Is the Neo Flex good for beginners?
Yes, especially if you start with its more forgiving setup. You still have to learn the manual process, but it is a good way to get into espresso without spending a lot of money.
Does the Flair Neo Flex need electricity?
No. It is completely manual. You need hot water, ground coffee, and your own effort to pull the shot.
Does the Flair Neo Flex come with a tamper?
Yes, the Neo Flex comes with a basic plastic tamper. It is enough to get started, although you can upgrade later if you want a heavier metal tamper.
3. Leverpresso V4 Best Portable Espresso Maker Under $100
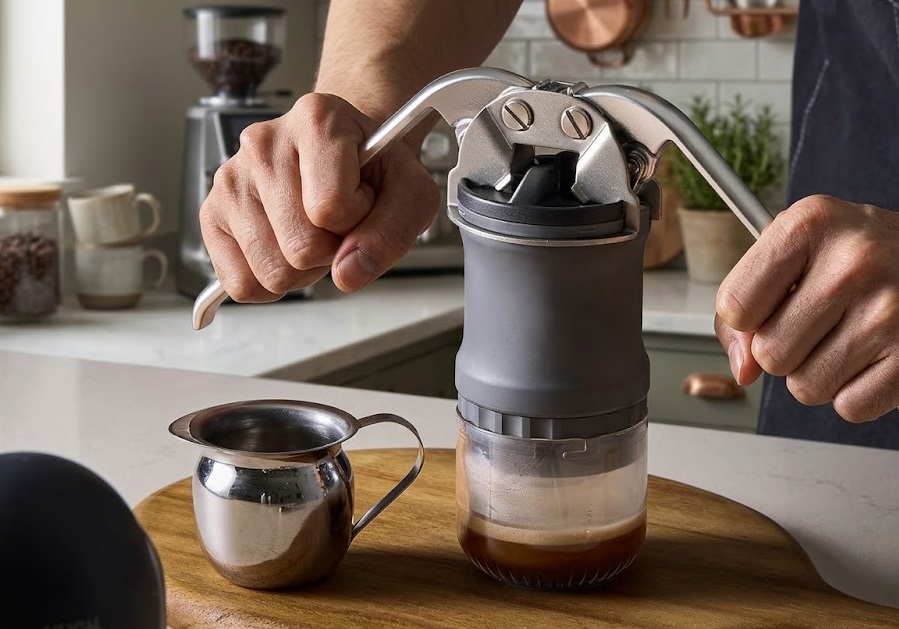
The Leverpresso V4 is my third pick, and it is probably the most interesting option here if portability is your main concern.
I have used the Leverpresso V4 at home and while traveling, and I like how little space it takes up. It does not need electricity, and you can pack the whole setup much more easily than a traditional espresso machine.
If you are searching for an espresso machine under $100 that you can take on trips, this is one I would seriously consider.
How to use Leverpresso V4
Key Specifications
- Type: Dual-lever manual espresso maker
- Pressure: Up to around 9 bars
- Basket: 51mm
- Power: No electricity
- Weight: Less than 500g
- Best For: Travel and manual espresso
What Makes the Leverpresso V4 Different?
The dual-lever design is the main feature that makes the Leverpresso V4 different.
You use the levers to generate pressure during extraction, giving you good control over the shot.
Once I figured out the grind size and dose that worked best for my coffee, I was able to pull shots with good body and crema.
I also like the 51mm basket because it gives you plenty of accessory options. If you eventually want to improve your setup with a better tamper, funnel, or other accessories, the standard size makes upgrades easier.
How Portable Is It?
Very portable.
The Leverpresso V4 is small enough to fit in a backpack, and because it does not require electricity, it is useful for road trips, camping, work travel, and other situations where a normal espresso machine is not practical.
You just need hot water and ground coffee.
For me, this is the biggest reason to choose it over a traditional electric machine.
Espresso Quality
The espresso can be excellent once you get the technique right.
I found medium and darker roasts easier to work with. Lighter roasts can be more challenging because they often need more careful grinding, temperature control, and extraction.
If a lighter roast tastes sour or weak, I would experiment with a finer grind, longer extraction, or better preheating.
This is one of the trade-offs with manual espresso. You have more control, but you also have more responsibility for the final result.
What I Don’t Like About the Leverpresso V4
The included accessories are not my favorite part of the package.
The funnel and tamper feel basic, and if you use the machine regularly, you may eventually want to replace them.
I also wish it had a pressure gauge. A gauge would make it easier for beginners to understand how much pressure they are using during extraction.
Fortunately, the machine does not need a pressure gauge to make good espresso. It simply means you have to learn to judge the process through practice.
Can You Use a Stand?
Yes, a stand can make the Leverpresso V4 more practical for regular home use.
Without a stand, the workflow is more portable and compact. With a stand, it becomes easier to use the machine in a more traditional countertop setup.
For someone who uses it every day, I think the stand is worth considering.
Final Verdict
After using the Leverpresso V4 for an extended period, I think it is one of the better choices for someone who wants portable espresso.
It is not as convenient as an electric machine, and it takes practice. But if you want manual control and the ability to make espresso without electricity, it offers a lot for the money.
For travelers, campers, and people who simply enjoy manual coffee, the Leverpresso V4 is a strong option among the best espresso machines under $100.
Pros and Cons
Pros
- Produces real espresso with manual pressure
- No electricity or batteries required
- Very portable
- Lightweight
- Uses a standard 51mm basket
- Good control over extraction
- Can be used with a stand
- Easy to take apart for cleaning
Cons
- Takes practice
- Lighter roasts can be harder to extract
- No pressure gauge
- Included accessories could be better
- Slower than an electric espresso machine
Frequently Asked Questions About the Leverpresso V4
Is the Leverpresso V4 worth it?
Yes, if you want a portable manual espresso maker. It gives you good control and does not require electricity, which makes it especially useful for travel.
Does the Leverpresso V4 need electricity?
No. It is completely manual. You only need hot water, ground coffee, and the machine itself.
Is the Leverpresso V4 good for beginners?
It can be, but I would recommend the De’Longhi Stilosa to someone who wants the easiest electric setup. The Leverpresso V4 is better for someone who enjoys experimenting with manual espresso.
Which Is the Best Espresso Machine Under $100?
After using these three machines, I would not say that one is perfect for everyone. The right choice depends on how you want to make espresso.
| Espresso Maker | Best For | My Pick |
| De’Longhi Stilosa | Beginners and home use | Best Overall |
| Flair Neo Flex | Manual espresso and travel | Best Manual |
| Leverpresso V4 | Portable espresso | Best for Travel |
Best Overall: De’Longhi Stilosa
If you want an electric machine for your kitchen, I would choose the Stilosa. It is affordable, compact, and easier to use than the two manual options.
Best Manual Espresso Maker: Flair Neo Flex
Choose the Neo Flex if you enjoy the hands-on process and want a lightweight espresso maker that does not require electricity.
Best Portable Espresso Maker: Leverpresso V4
The Leverpresso V4 is my choice for travel. It is compact, lightweight, and gives you plenty of control once you learn how to use it.
What to Look for in an Espresso Machine Under $100
Before buying an espresso machine at this price, there are a few things I recommend checking.
Electric vs. Manual
First, decide whether you want an electric or manual machine.
An electric machine like the Stilosa is more convenient for everyday home use. Manual machines like the Flair Neo Flex and Leverpresso V4 take more effort but give you more portability and control.
Portafilter and Basket
The basket can have a major effect on your brewing experience.
Pressurized baskets are generally more forgiving and can work better for beginners using pre-ground coffee. Non-pressurized baskets give experienced users more control but usually require a better grinder.
Grinder Quality
Don’t overlook the grinder.
A cheap espresso machine paired with fresh coffee and a suitable grinder can produce better results than a more expensive machine paired with stale coffee and an inconsistent grind.
If your budget is strictly $100 for the machine, you do not necessarily need to buy an expensive grinder immediately. But it is worth planning for one as you improve.
Cleaning and Maintenance
Budget machines still need proper care.
Clean the portafilter and basket regularly, wipe the steam wand after every use, and descale the machine when necessary.
Manual machines are usually easier to clean because there are fewer internal components, but you still need to rinse and maintain them after brewing.
Final Thoughts
Finding the best espresso machines under $100 is really about finding the machine that fits your brewing style.
If you want a simple electric espresso machine for your kitchen, I would choose the De’Longhi Stilosa. It offers the best balance of price, convenience, and espresso quality for most beginners.
If you want a completely manual experience, the Flair Neo Flex is my favorite. It takes more effort, but it is lightweight, portable, and genuinely fun to use once you learn the process.
And if portability is your number-one priority, the Leverpresso V4 is the one I would take on the road.
One final piece of advice from my own experience: don’t judge an espresso machine only by its price. Fresh coffee, grind size, proper dosing, and technique can make a huge difference, especially with budget machines.
You may not get every feature found on a $500 espresso machine for less than $100, but you can still make a very enjoyable cup of espresso at home without spending a fortune.
For most beginners searching for the best espresso machine under $100, my overall pick remains the De’Longhi Stilosa.